🝰 dusk
user guide
–
Installation
The fastest way to install dusk is running the install script from the Terminal on macOS or Debian Linux. Using Tails with persistence on a USB or inside a virtual machine on any operating system is recommended for additional security, but not required.
curl -o- https://rundusk.org/install.sh | bash
You may be prompted for your password. Follow any prompts to complete the installation. Once finished, you can run dusk from your Terminal or launch it from your applications menu! Feel free to skip right to the Basics.
If you’d like to isolate dusk from the rest of your operating system, you might prefer to run a Virtual Machine as described in the next section.
Virtualization
The dusk software is designed and tested to run on Debian under the GNOME desktop environment. Debian is a well-maintained and tested operating system and the GNOME desktop environment provides an excellent experience to users coming to Linux from macOS.
You can run Debian and Dusk inside the operating system of your choosing by using a virtual machine: this allows you to run dusk’s environment without making changes to your operating system.
If this sounds scary or hard - don’t worry! It’s easier than it sounds. The next sections provide a detailed guide on how to get up and running in a virtual machine on Debian, macOS, or Windows.
There are many options for virtualization software for every platform, but this guide will show you how to use the ones that have the simplest feature set to get the job done and are free and open-source
MacOS
- Download and install UTM.
- Download the Debian Trixie ISO
- Create a VM in UTM using the Trixie .iso file you downloaded
- Once installed, the steps are the same as in the Debian section below.
Windows
Windows users should expect a similar process as macOS, but using VirtualBox.
Debian
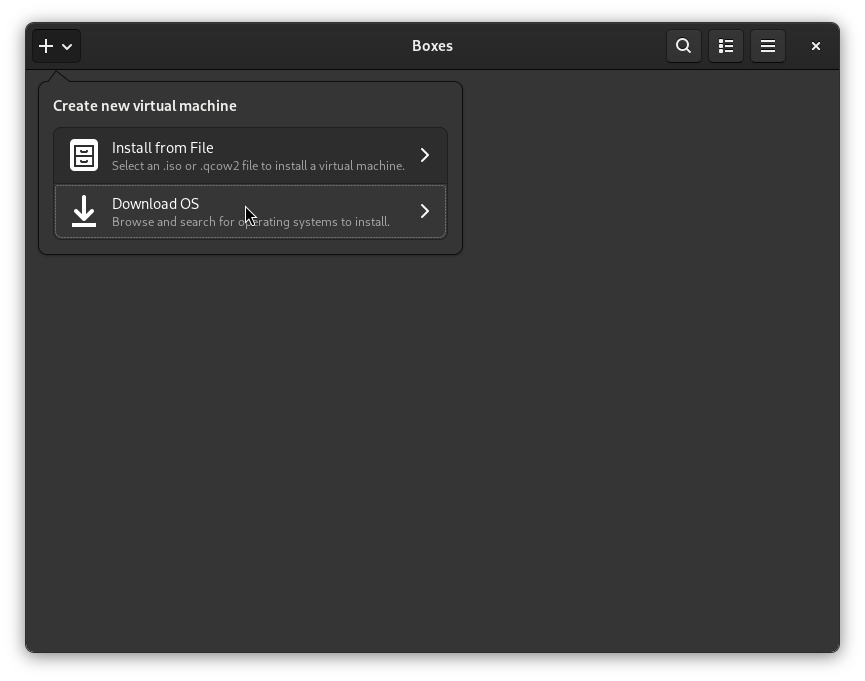
First, download and install GNOME Boxes.
sudo apt install gnome-boxes
Once installed, open Boxes, click the Plus + icon and select Download OS.
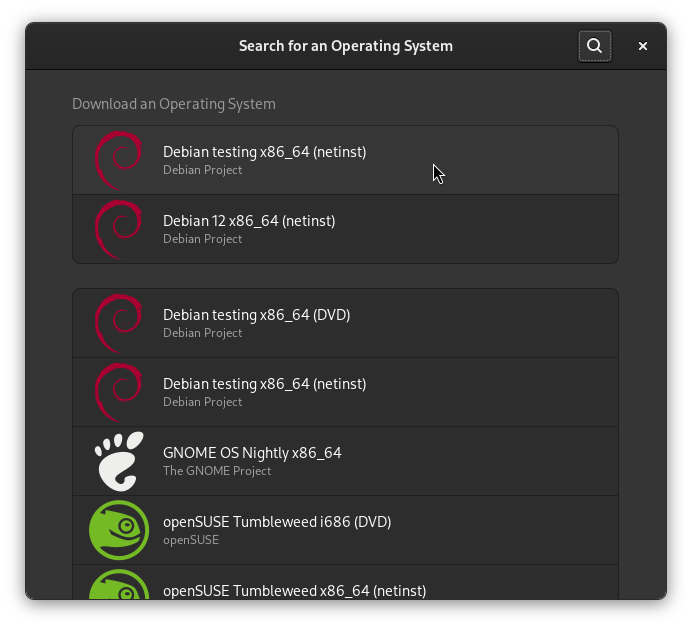
Select “Debian Testing x86_64 (netinst)”.
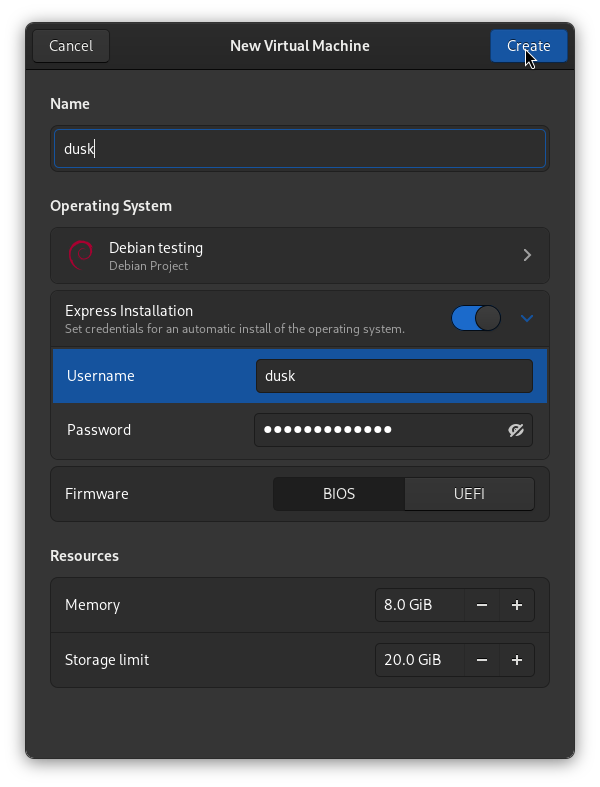
Enter dusk for the name, ensure Express Installation is enabled, enter dusk for your username and set a password. Set Memory to at least 8.0GiB and storage to whatever you like (you can change this later).
When you’re finished, click Create. Wait for the download and installation to finish, it may take a bit.
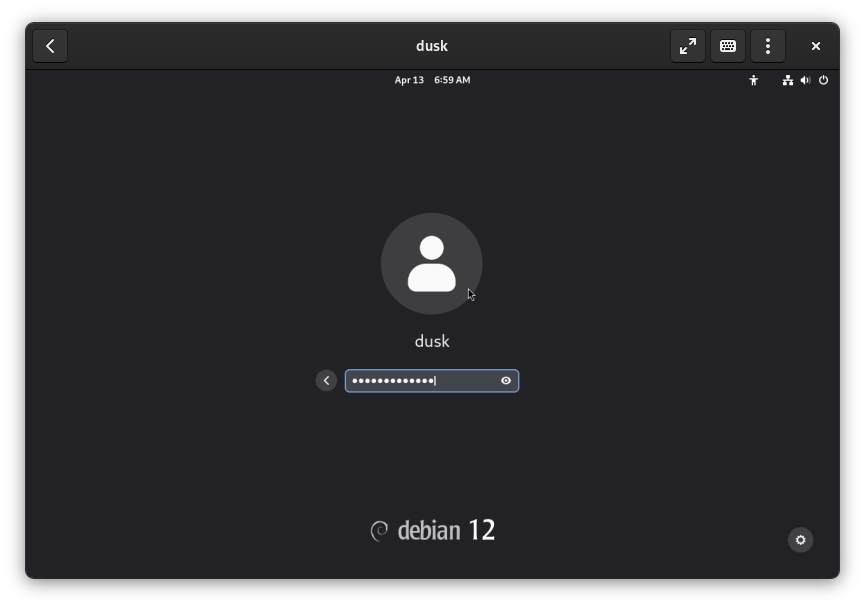
Once complete, you should have a Debian 12 login screen. Enter the password you set during installation to login.
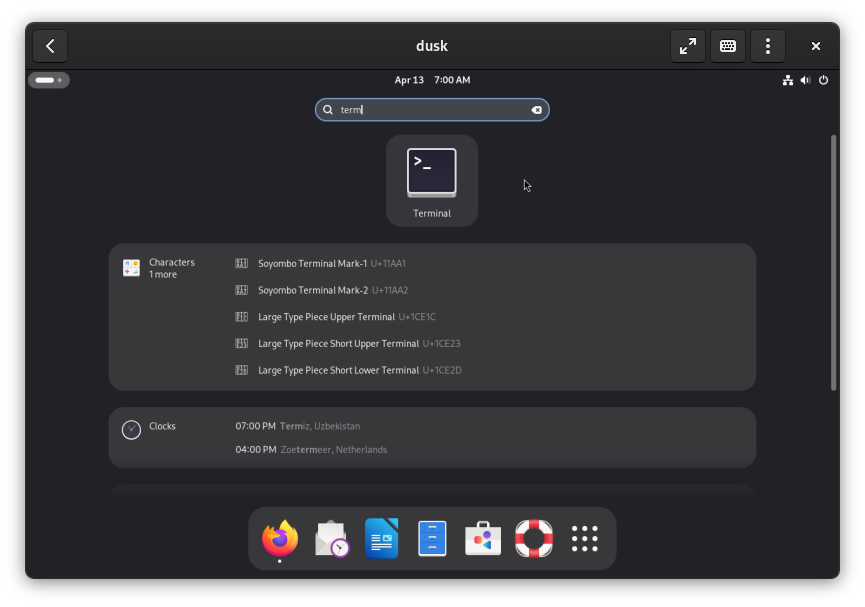
To install dusk, you’ll need administrator privileges. Open the Terminal app by pressing the Super Key (“Windows” key or “Command” on macOS), typing “Terminal”, and pressing enter or clicking the icon that appears.
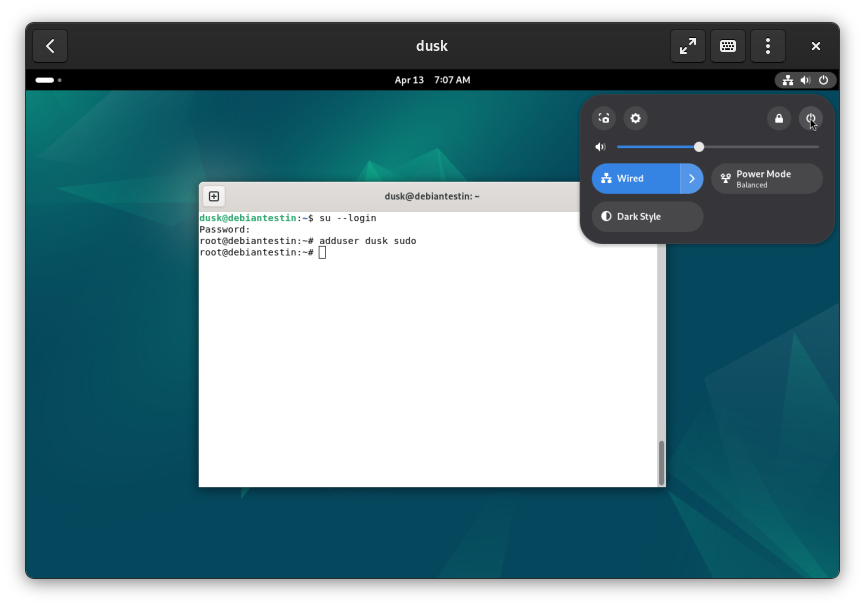
In Terminal, type su --login and press Enter. Type your password and press Enter again.
Add the dusk user to the administrator group, by typing adduser dusk sudo and pressing Enter. Now restart the virtual machine by clicking the Power icon in the top right of the menu bar and selecting Restart.
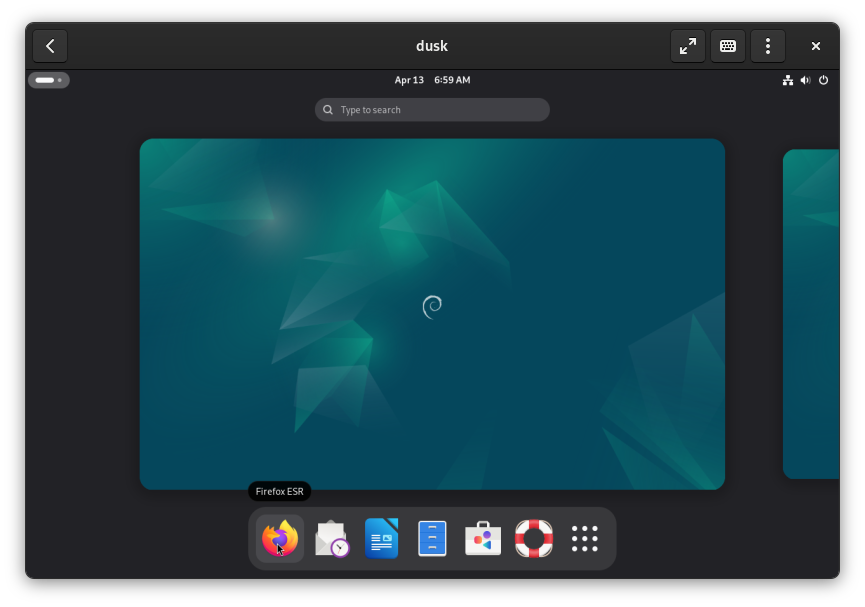
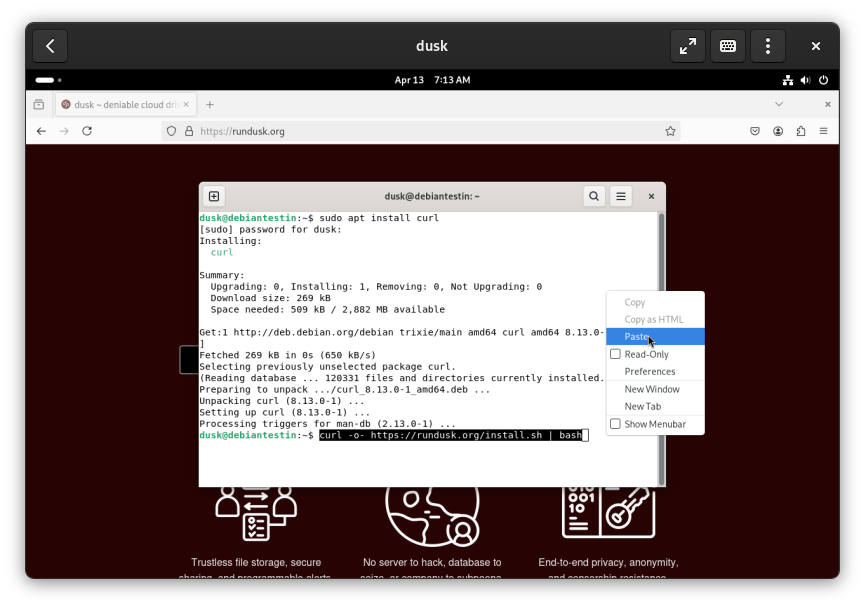
The virtual machine should restart and you’ll be returned to the login screen. Log back in and open Firefox. Navigate to rundusk.org and copy the install command from the homepage.

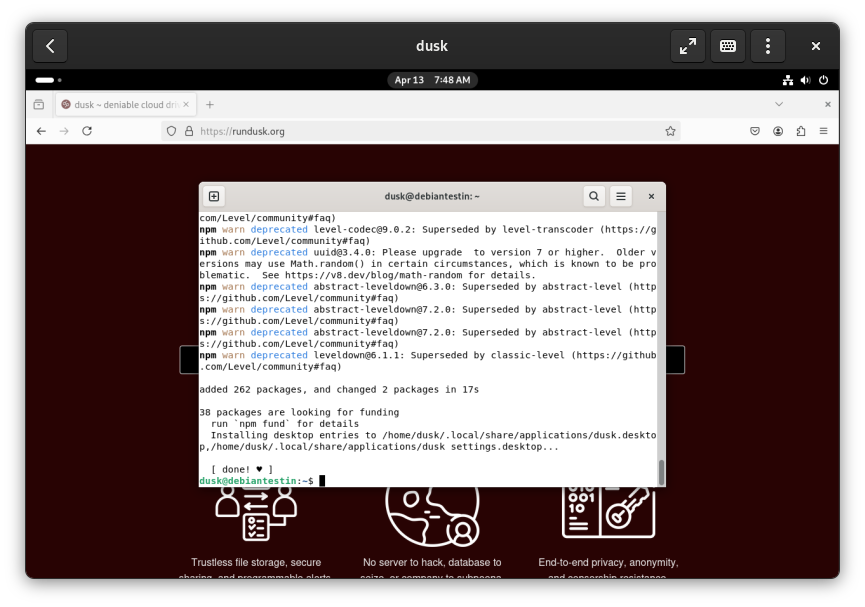
Open Terminal again (Super Key , then type “Terminal”). Install cURL, by typing sudo apt install curl and pressing Enter. Then, right click and paste the install command and press Enter.
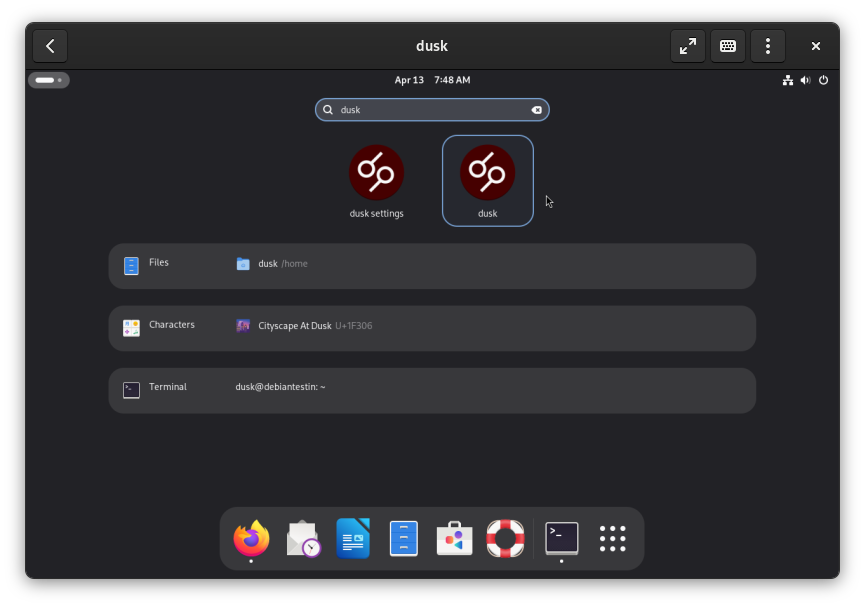
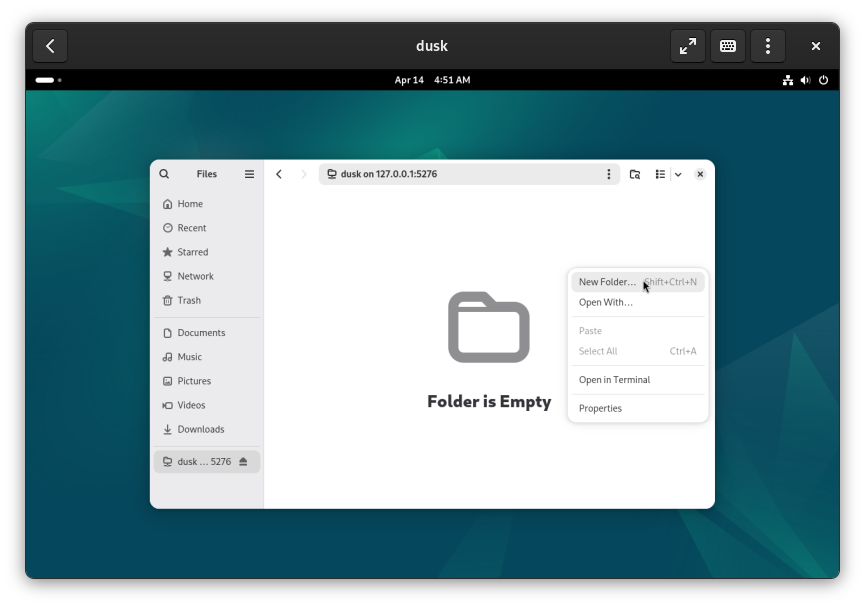
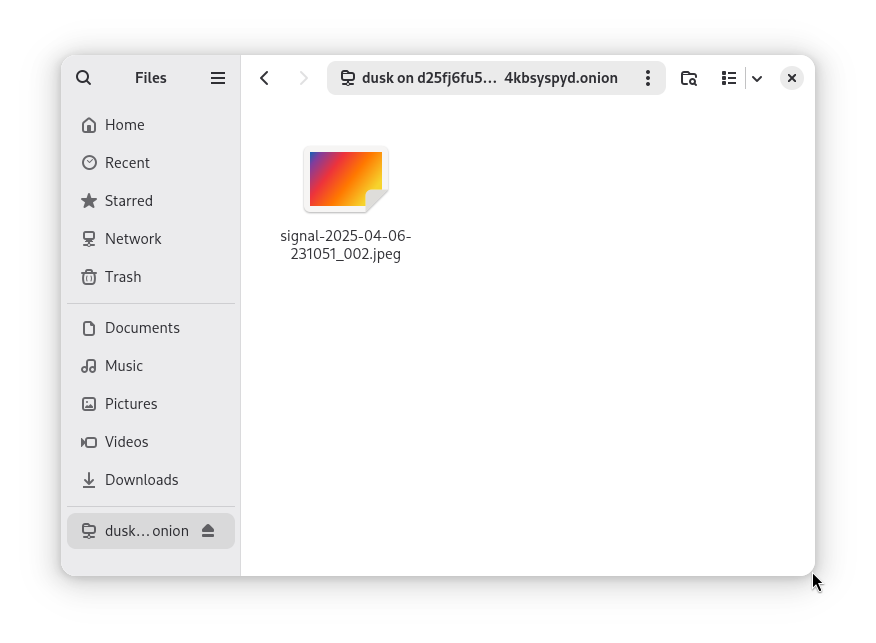
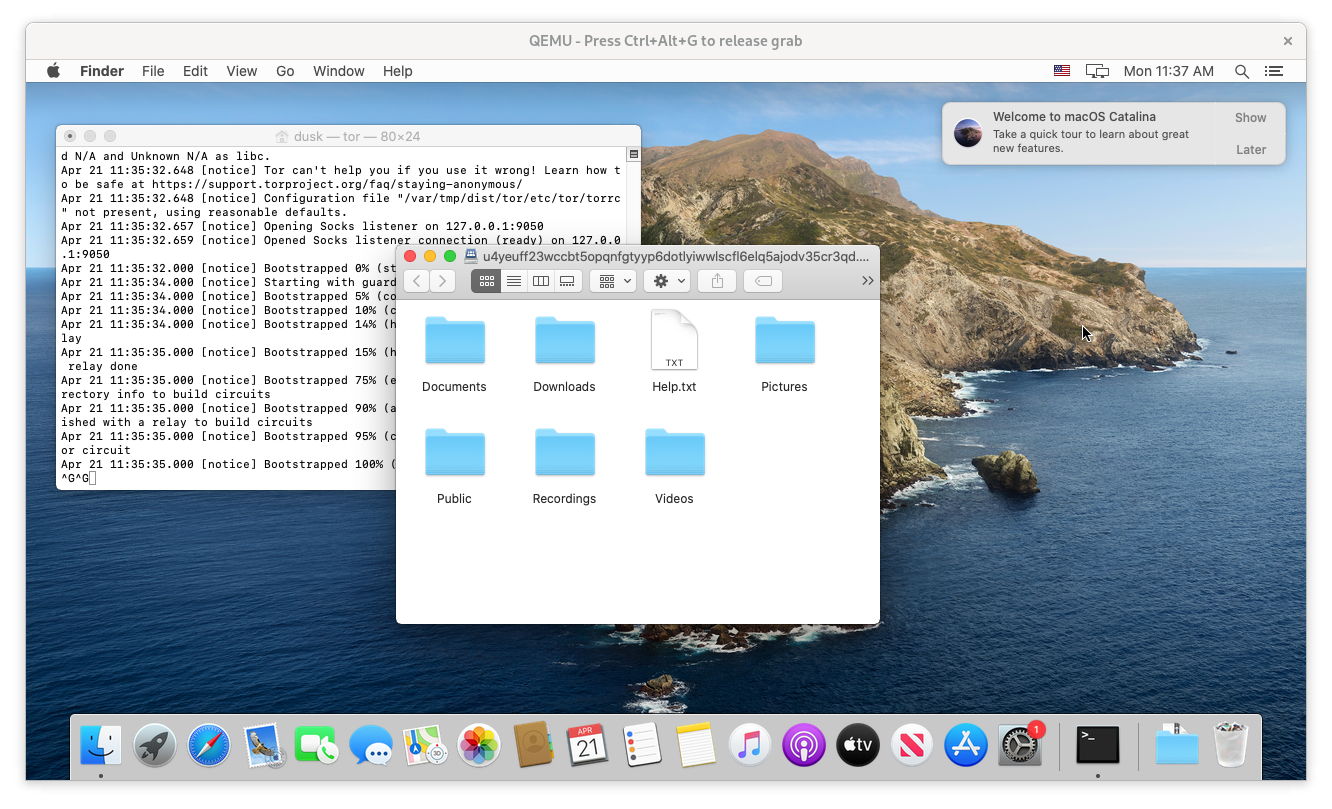
When the installer is finished, press the Super Key and type Files or dusk. You should see two apps: dusk:Files and dusk:Settings. Click on dusk:Files.
Follow the initial setup prompts.
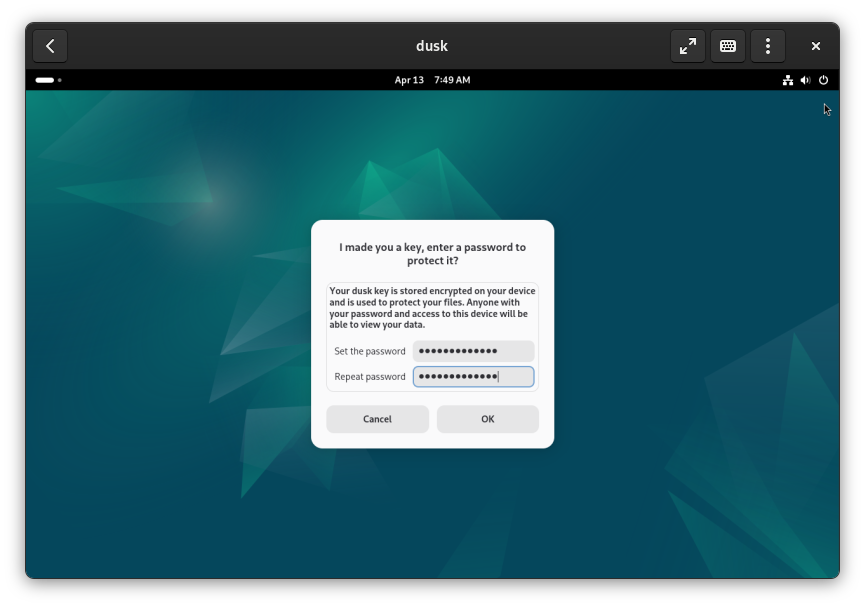
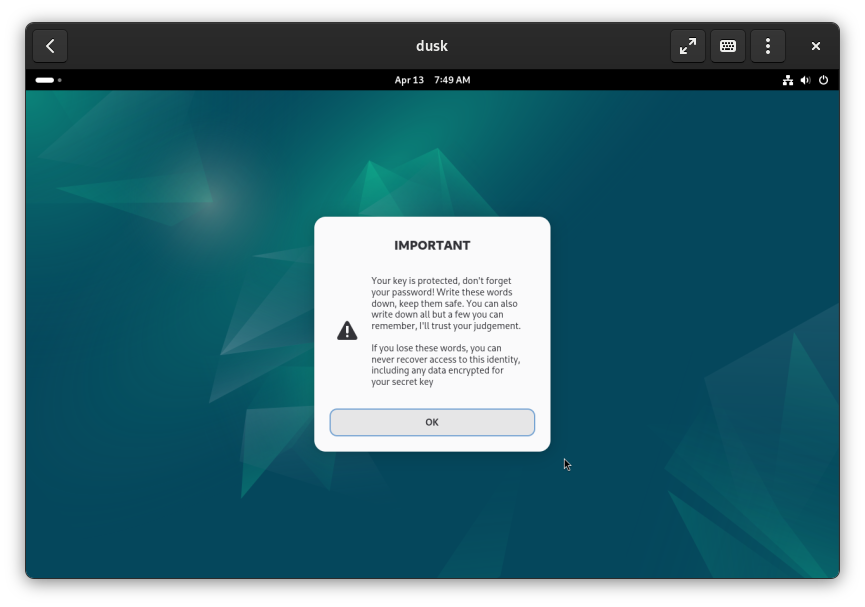
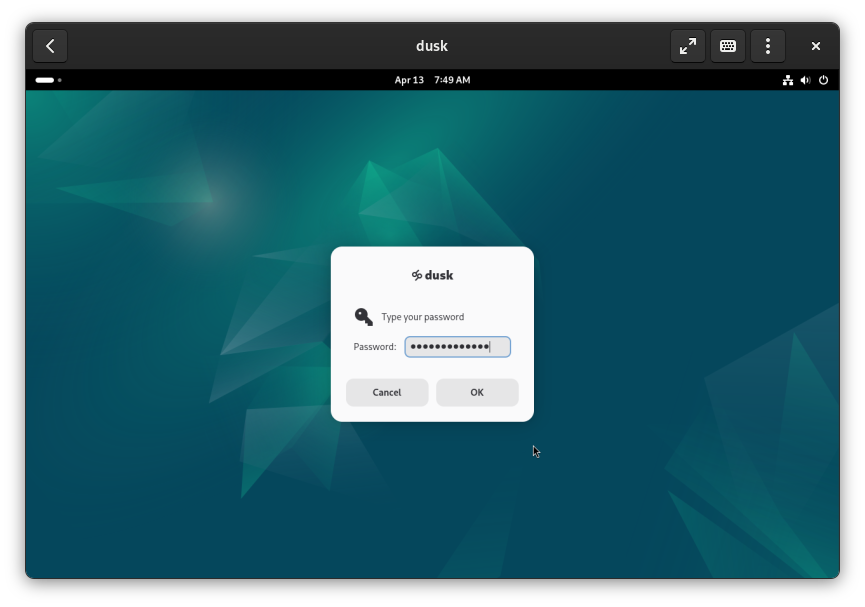

After dusk is finished, you’ll be prompted a final time for the password you set for dusk in the previous steps. Enter it to open the Files view.

Dusk is now installed and running. Use the virtual operating system to manage your sensitive material. Open dusk:Settings to link to other devices, create sneakernets, and more.
Basics
After installation, you immediately have the ability to store files. However, dusk is running in seed mode. This means that you haven’t given it any device links to others who are also running dusk. In it’s current mode, it is an encrypted virtual filesystem that you can access remotely.
This is useful and provides security, anonymity, and ease of access. However it does not provide durability (ability to recover lost files) or deniability (all your data is stored on a device that you possess). To gain those properties you need some human affinity.
Dusk is not a single unified network - it is ad-hoc and designed to be highly segmented, meaning there are many dusk networks that can appear and disappear as their individual group members change and regenerate. In simple terms, you run dusk with your friends, your community, your affinity group.
Your first-degree links may have other links that will also strengthen your network and those links may include others and so on.
Linking Devices
To take advantage of dusk’s deniability properties and strengthen your data security, you’ll need to link some devices.
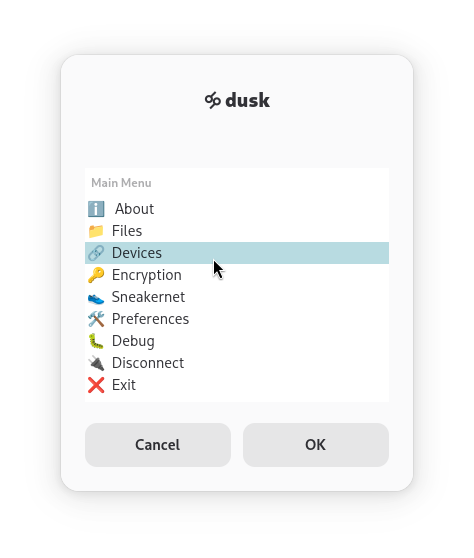
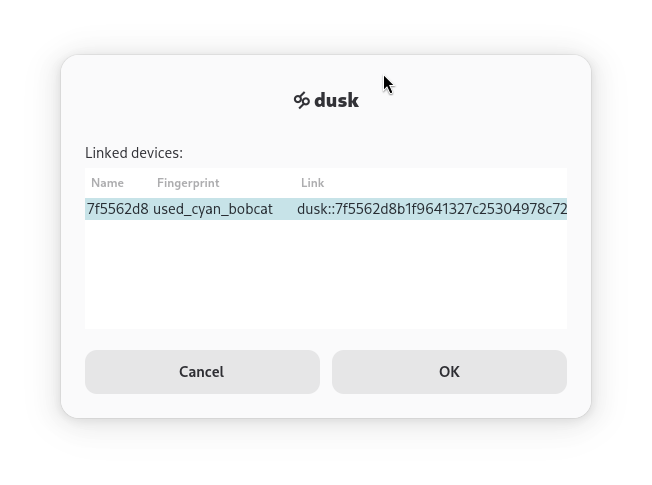
Press the Super Key, and type dusk:Settings to open the menu. Then, select Devices and click OK.
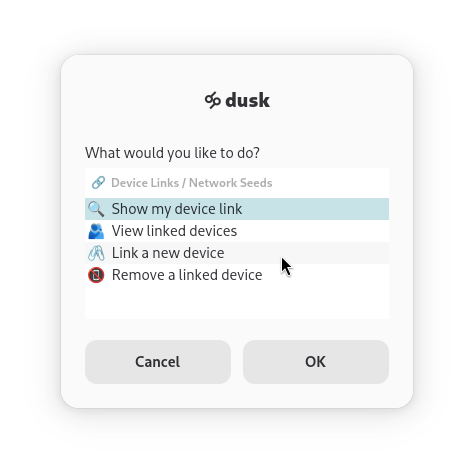
Selecting Show my device link and pressing OK will show your unique device link - which you share with members of your affinity network. To link a device, select Link a new device, paste the the link you received into the prompt and press OK.
A random short name will be assigned to this device so you can remember who it came from. This device is now a Link. Links can be added or removed at any time.

Links vs. Peers
Devices that you link will be devices that dusk connects to first. Through doing so, dusk may discover other devices that add to your network. Those devices are Peers. They serve most of the same function as Links, with the exception that dusk will not remember them or try to connect to them on startup.
Remote Access
Dusk exposes its encrypted virtual file system as a WebDAV server through a Tor onion service, which provides end-to-end encryption between your devices. Accessing dusk from another device, such as a phone or tablet (or another computer) just requires a WebDAV client and a Tor proxy.
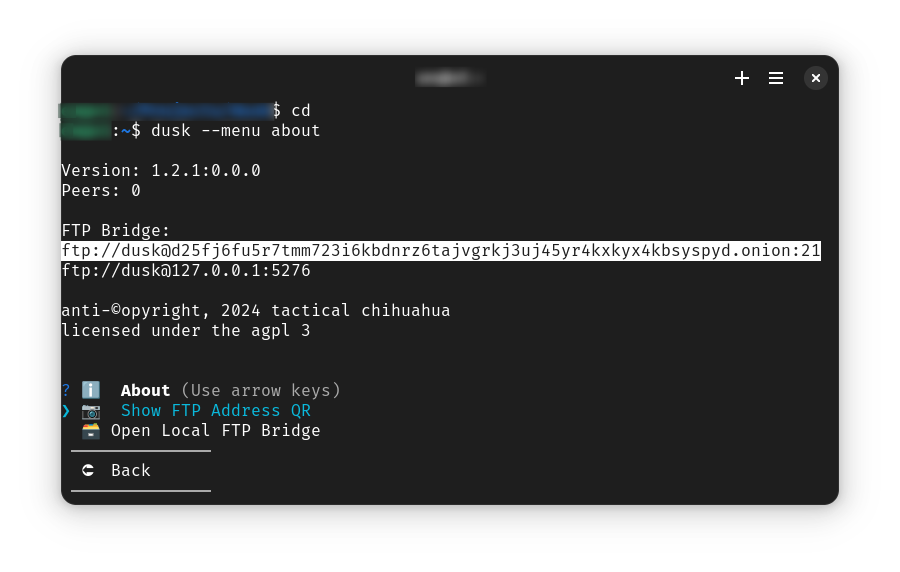
Both of these are readily available on every platform. You just need your WebDAV address. Press the Super Key and type dusk:Settings and launch the app. Select About and click OK.
You can also run
dusk -I statusfrom Terminal to print the WebDAV Bridge onion URL.
You will also be shown the option to display a QR code for easier setup on mobile devices. Follow the guide for your operating system below.
Debian
Make sure Tor is installed:
sudo apt install tor
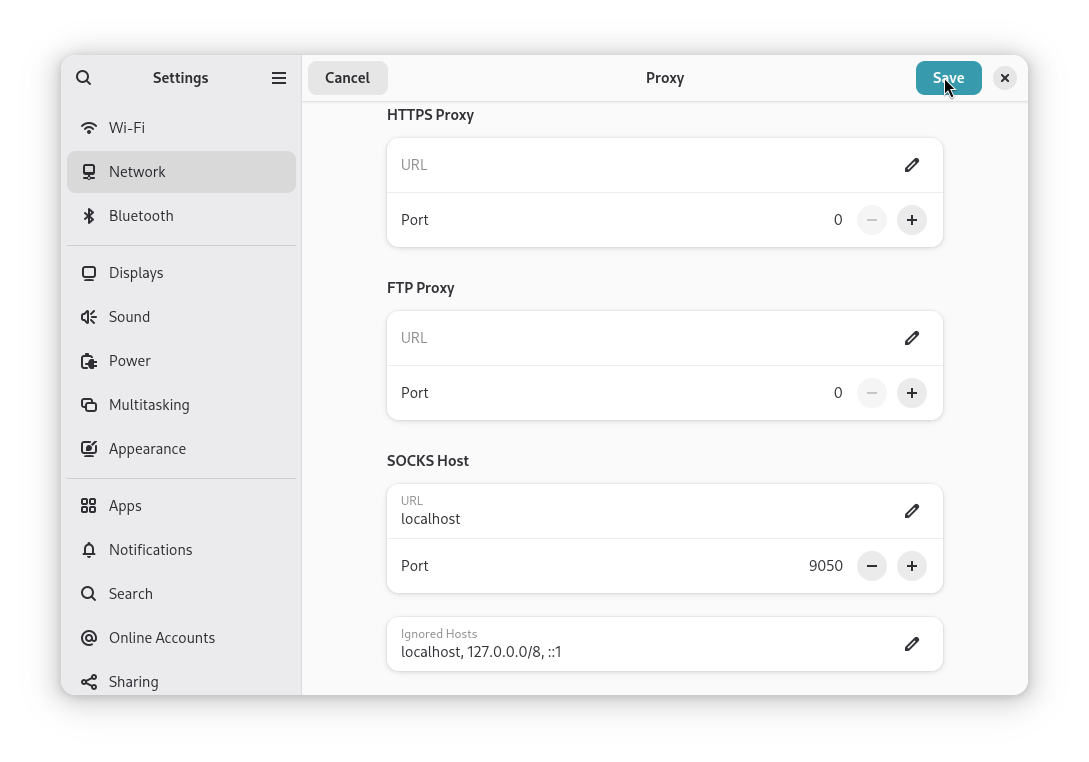
Open the system Settings app by pressing the Super Key and typing Settings. Select Network from the left sidebar, click Proxy and set SOCKS Host, URL to localhost and SOCKS Host, Port to 9050. This will tell apps to proxy connections through Tor - which is the only way to connect to your devices running dusk.
From your device running dusk, retrieve your WebDAV Bridge onion address. This can be found in dusk:Settings, About or by running dusk --menu about.
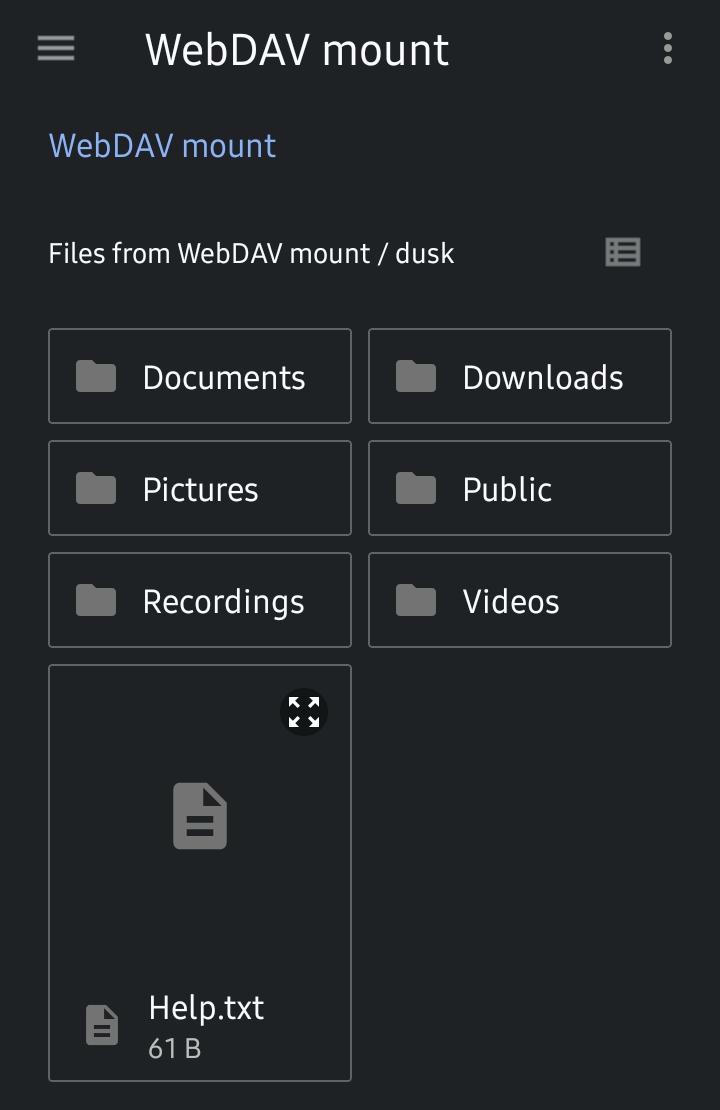
Open the system’s Files app (also called Nautilus), select Network from the sidebar, and paste or type the onion address. Click Connect.
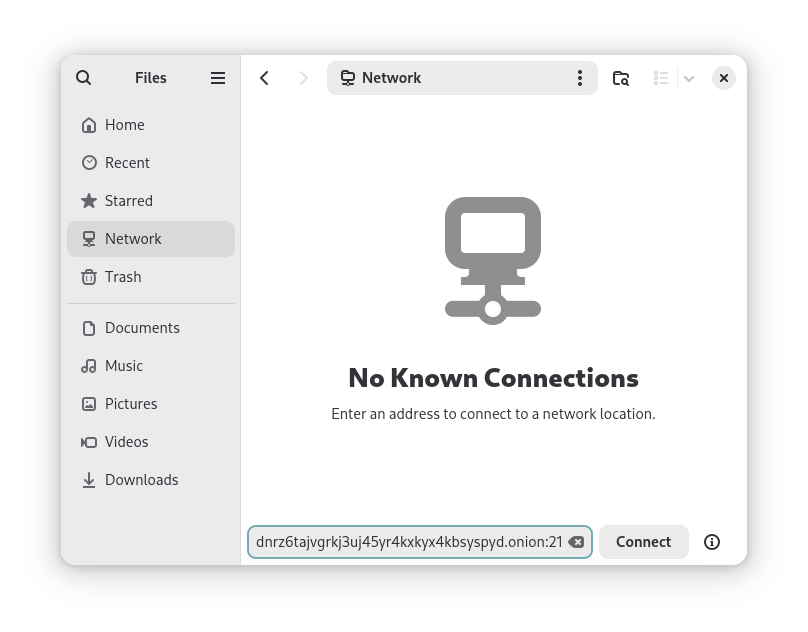
You will see your remote dusk drive in the Files app and can use it as you would on the device running dusk.
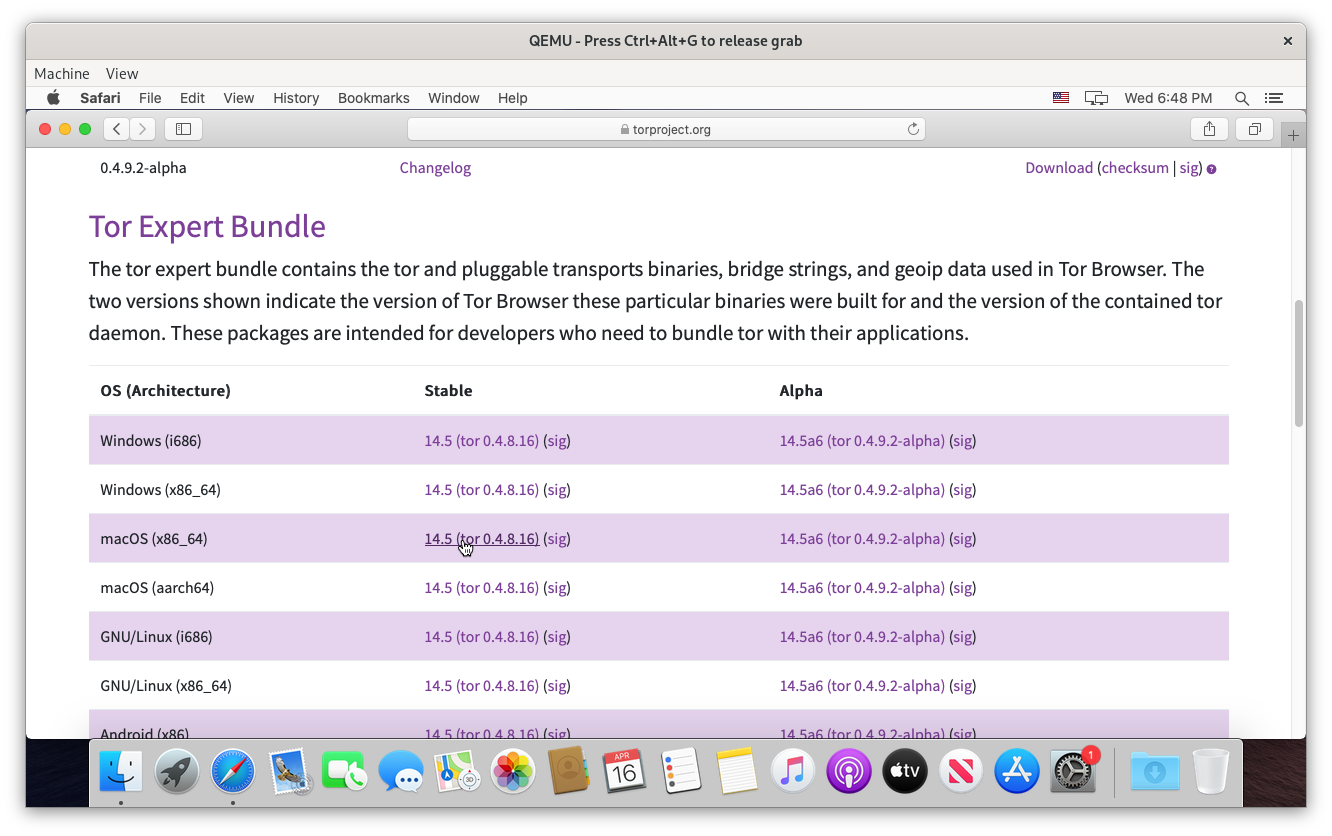
MacOS
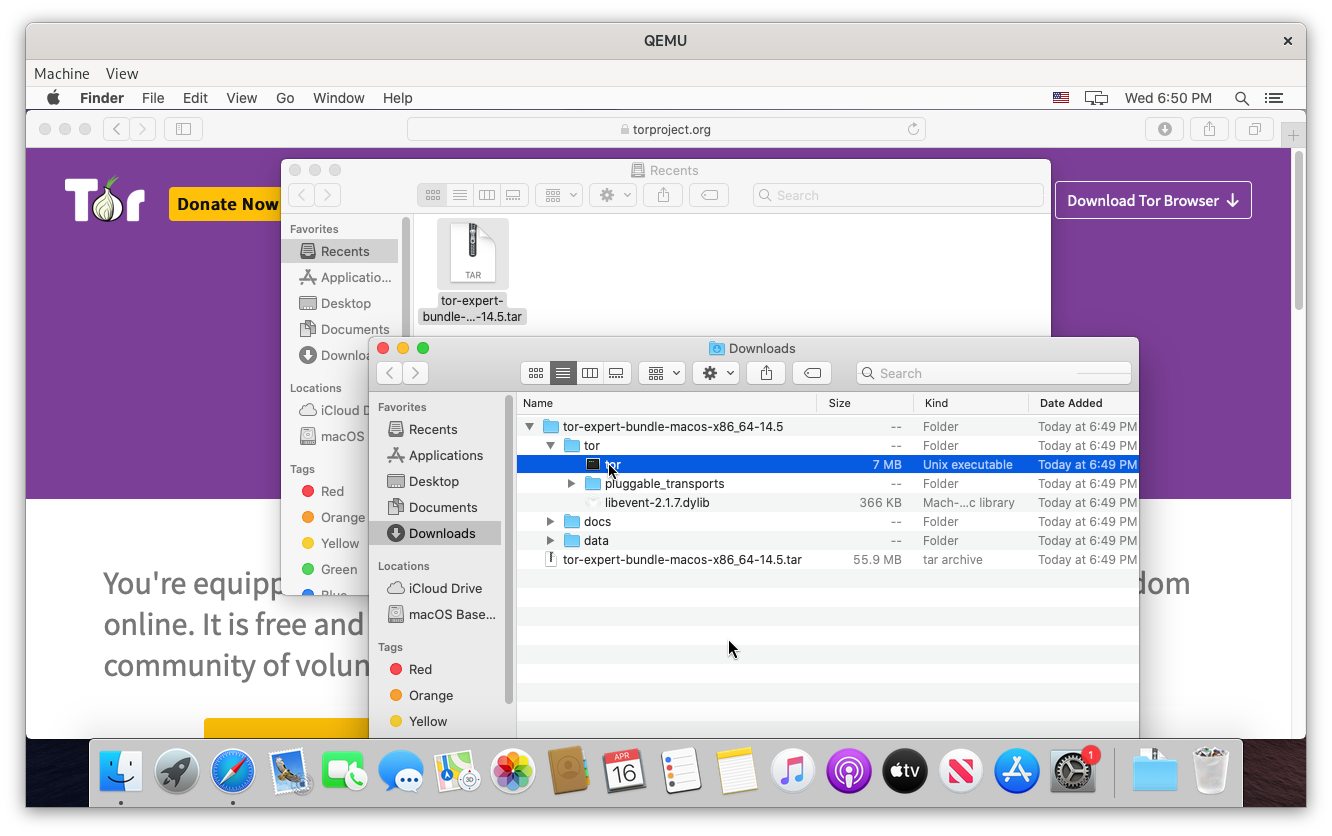
Mac users can expect a similar process to Debian. First, download the Tor Expert Bundle.
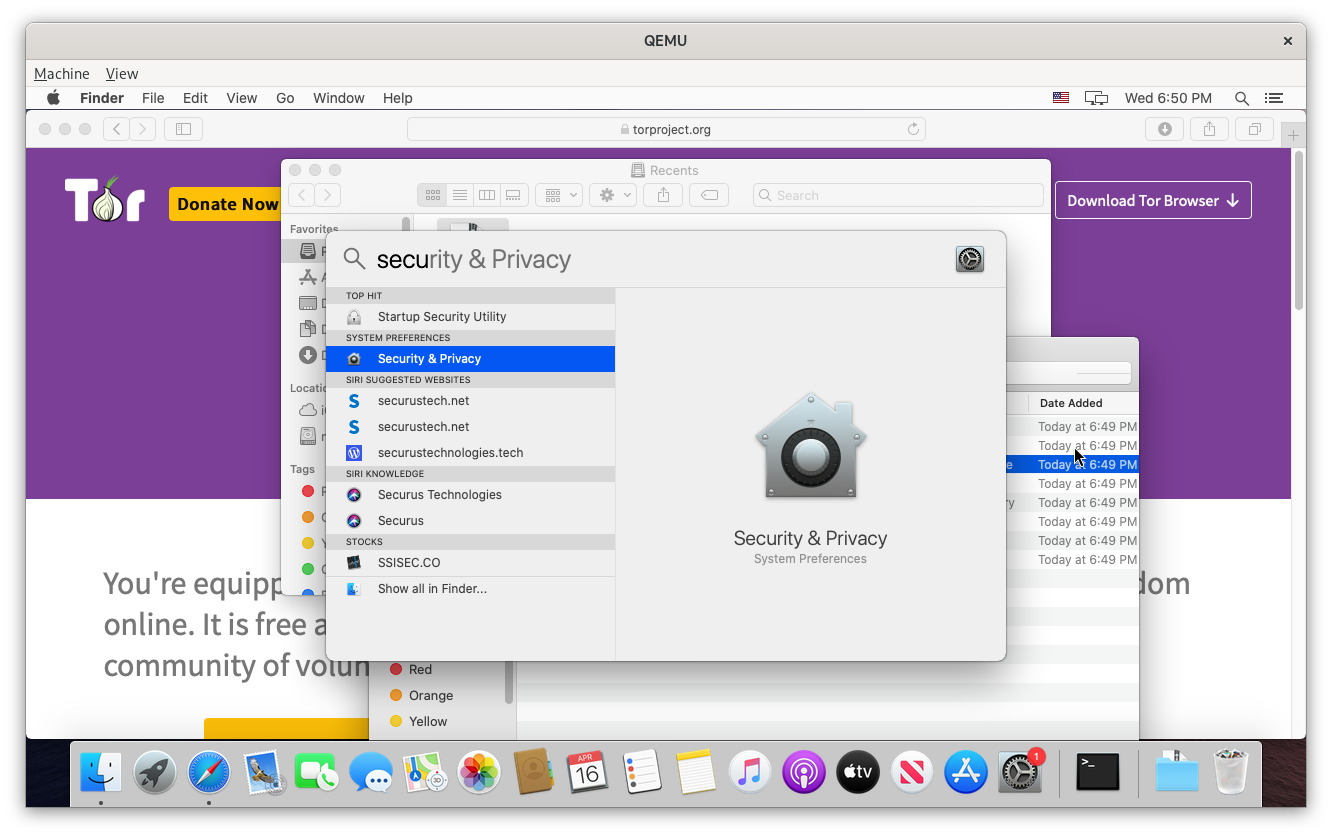
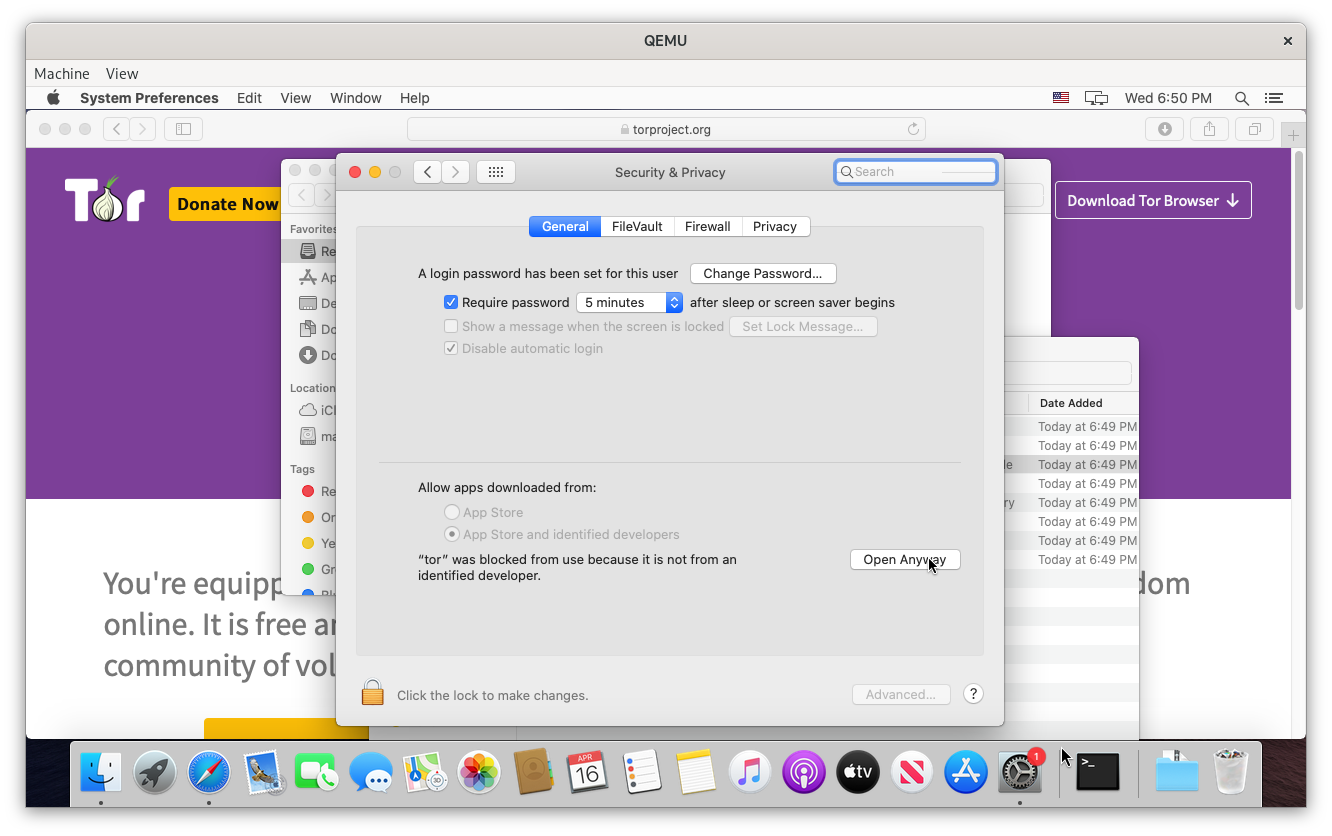
Open the .tar file and run the tor program. The operating system might block running tor. If so, open Security & Privacy from the system settings and click Open Anyway.
Then, open Network from the system settings, click Proxies, check the box next to SOCKS Proxy, enter localhost / 9050 for the server setting, and click OK.

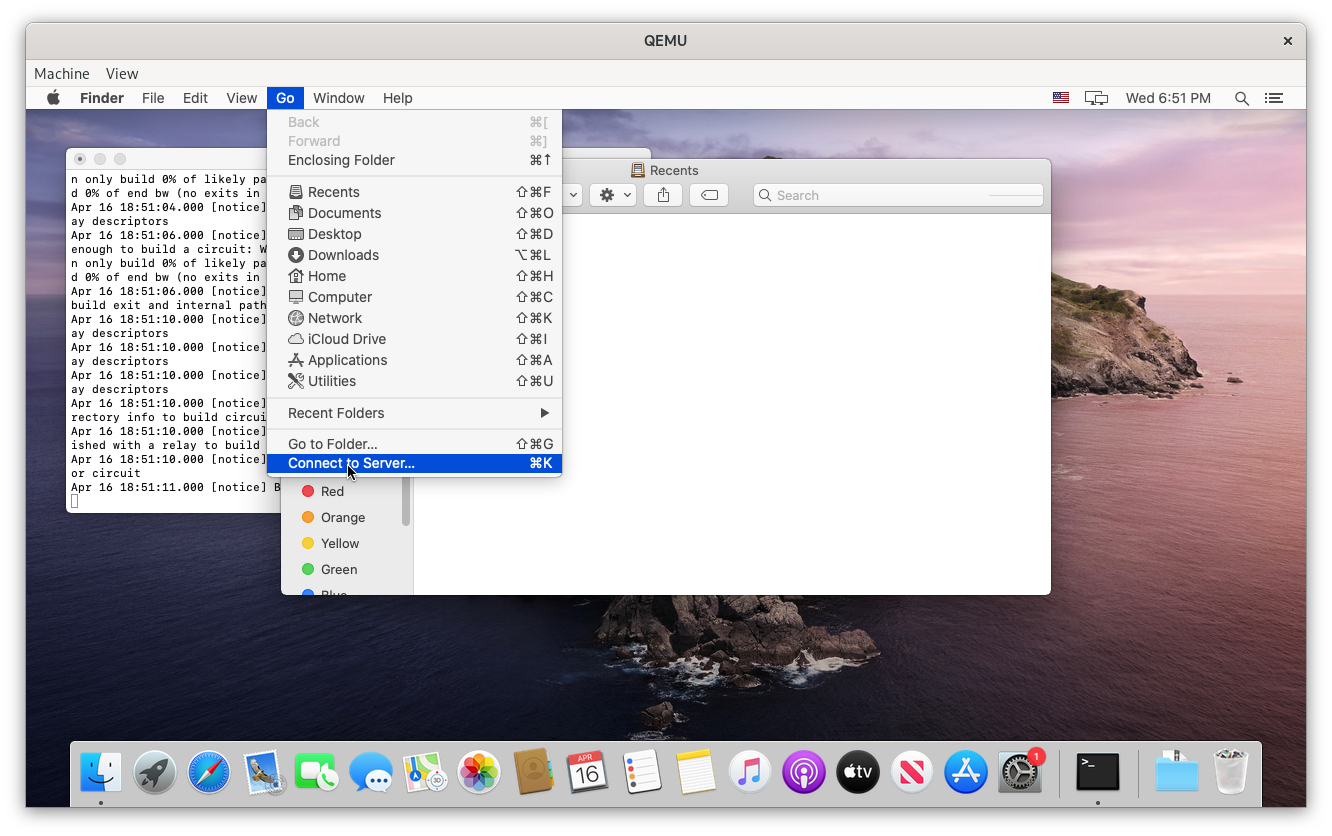
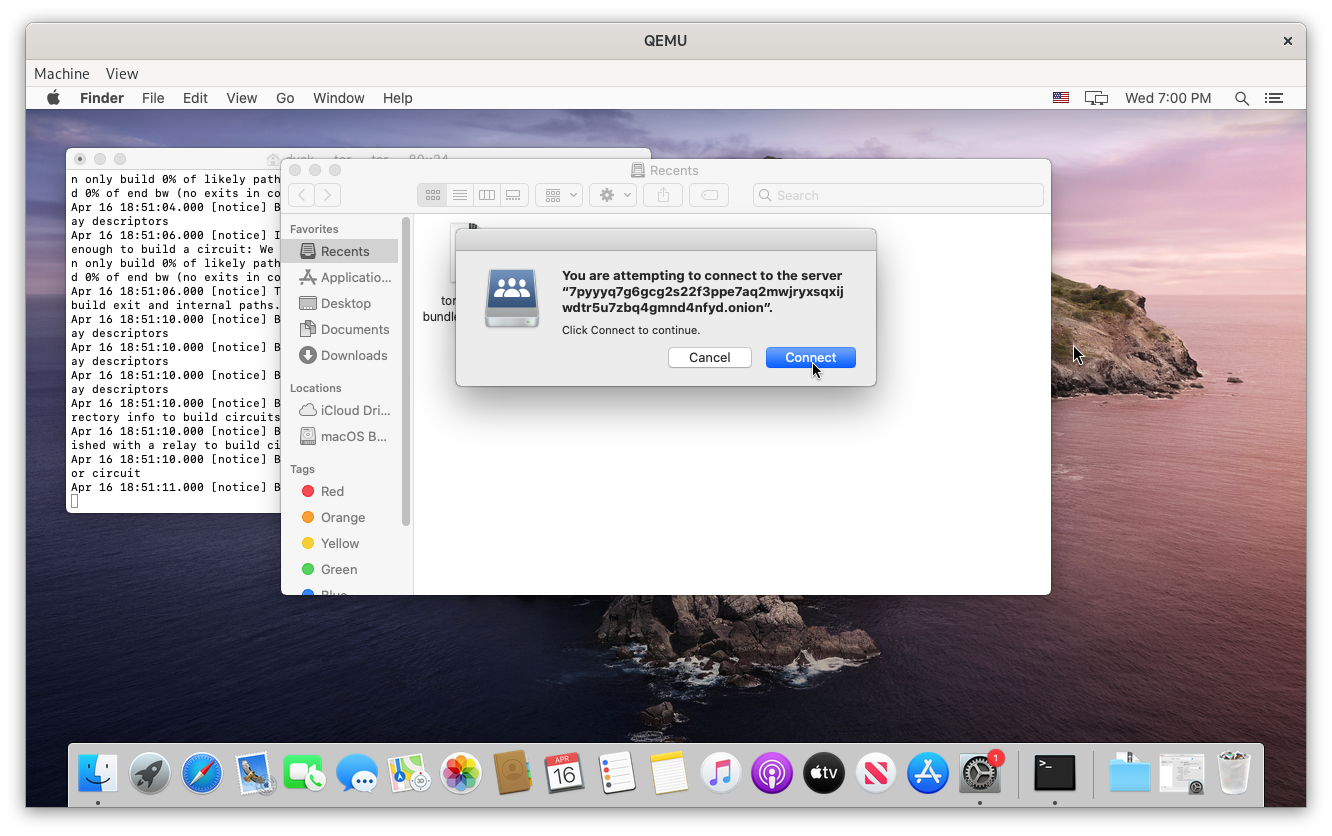
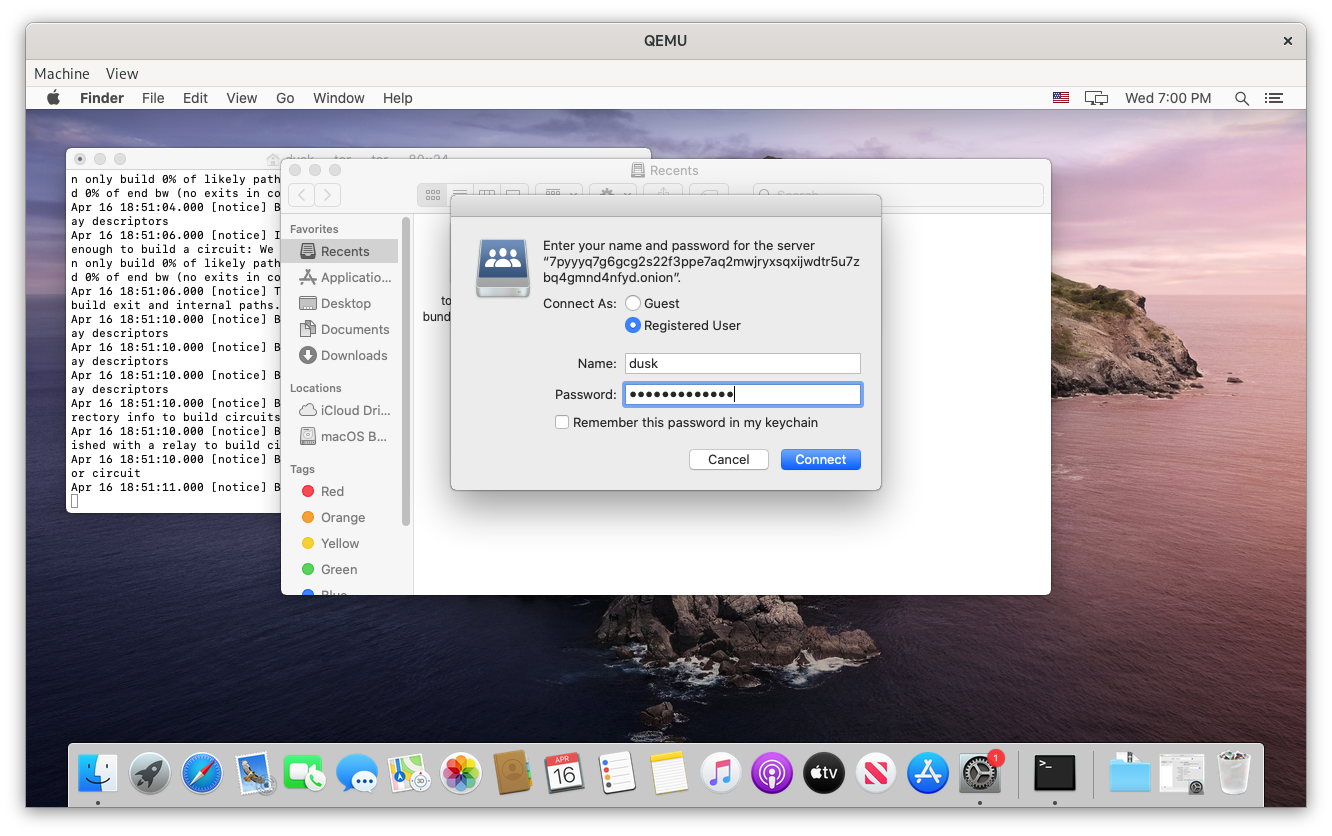
Open Finder and click Go, Connect to Server or Cmd + K, enter your dusk WebDAV URL, and click Connect. You’ll be prompted for a username and password. Unless you modified you dusk settings, your username is dusk and you password is your dusk password.
Dusk should connect and mount as a networked drive in Finder.
Windows
All reasonable paths to connect from Windows lead to sadness.
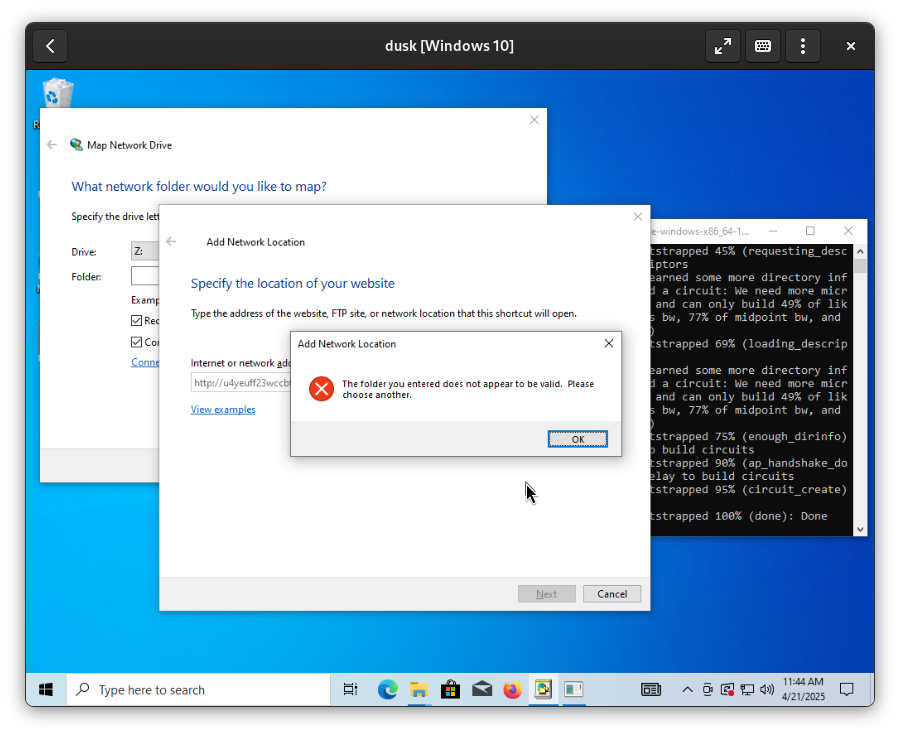
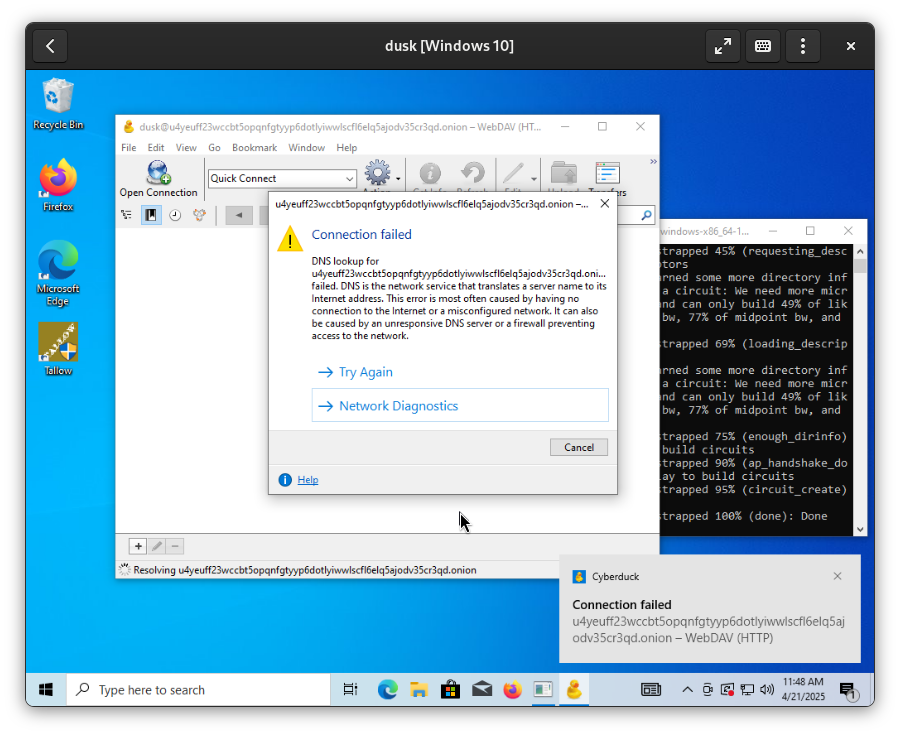
Better to run dusk inside a Virtual Machine as described earlier in this guide.
Android
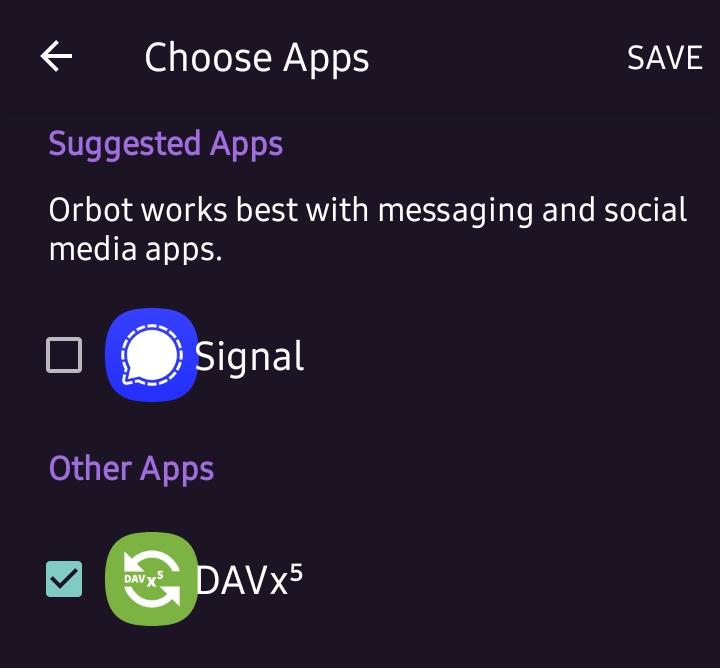
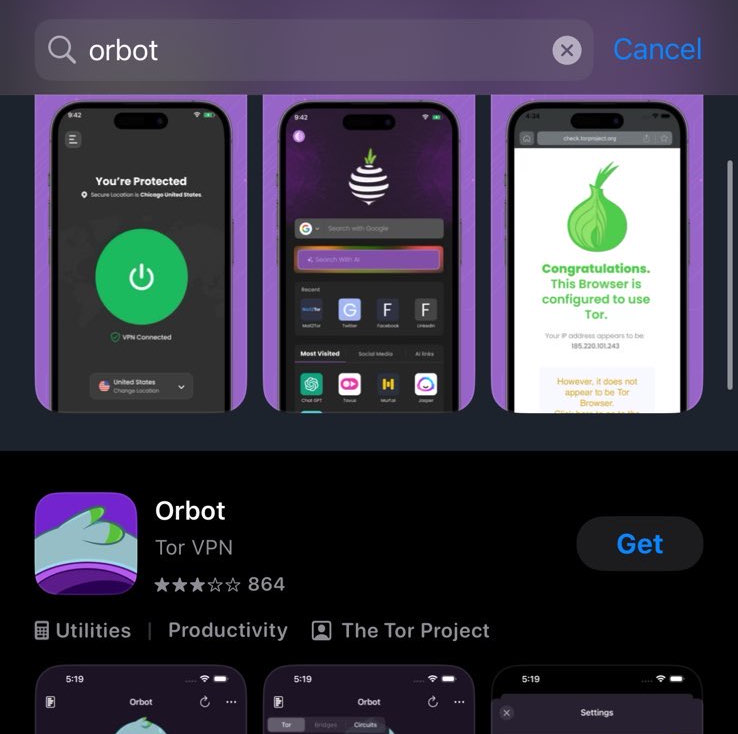
Android users can easily connect to their dusk drive. First install Orbot and DAVx5. Both are available using F-Droid and the “Play Store”.
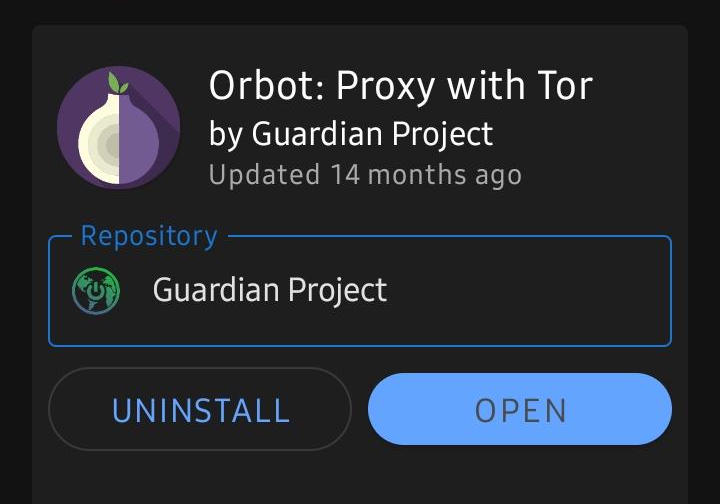
Open Orbot and click Select Apps. Make sure the box next to DAVx5 is checked and click Save.
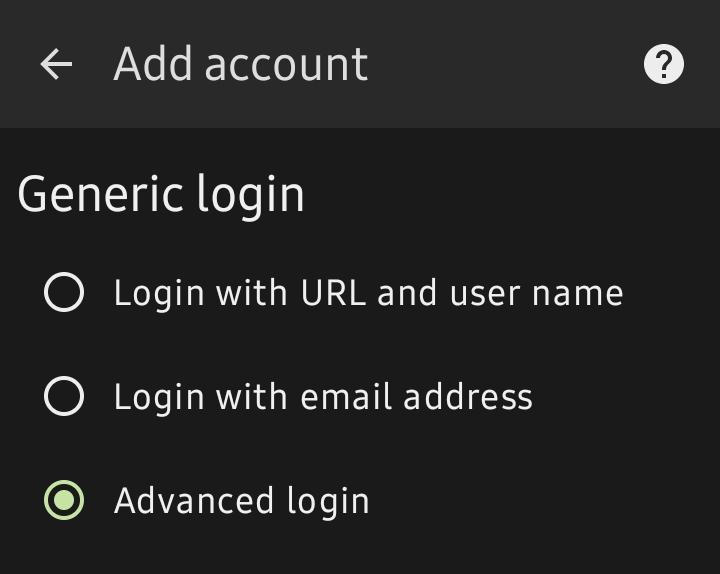
Open DAVx5 and navigate to Tools, WebDAV mounts, then add a new account. Choose Advanced Login and enter your URL, username, and password.
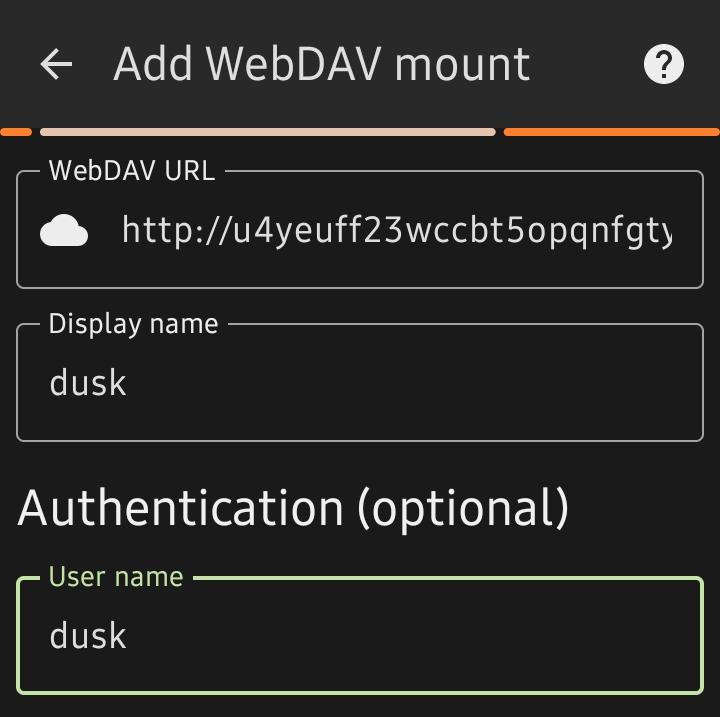
Your drive should now be mounted and show in your system file explorer.

iOS
WebDAV is no longer supported in iOS Files. There are various third party apps available to enable WebDAV, but currently none that this project recommends.
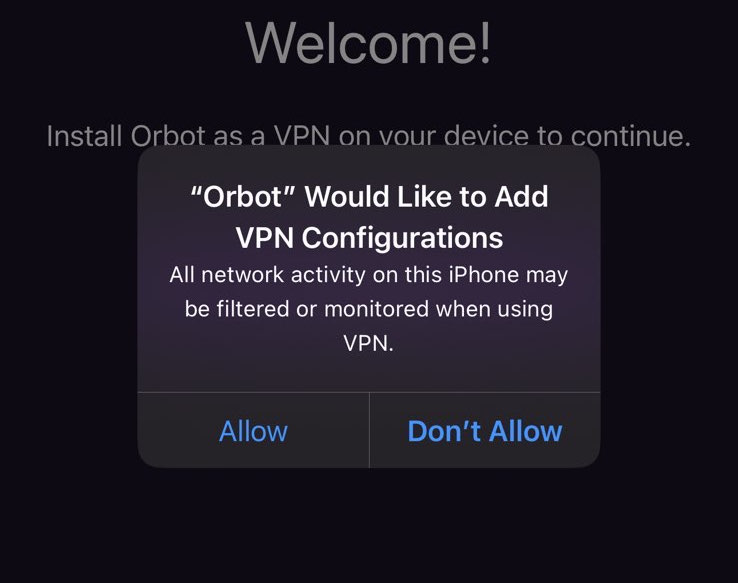
Regardless of the application you choose to access dusk on iOS, the steps should be mostly the same. First, Install Orbot and allow it to create a VPN.
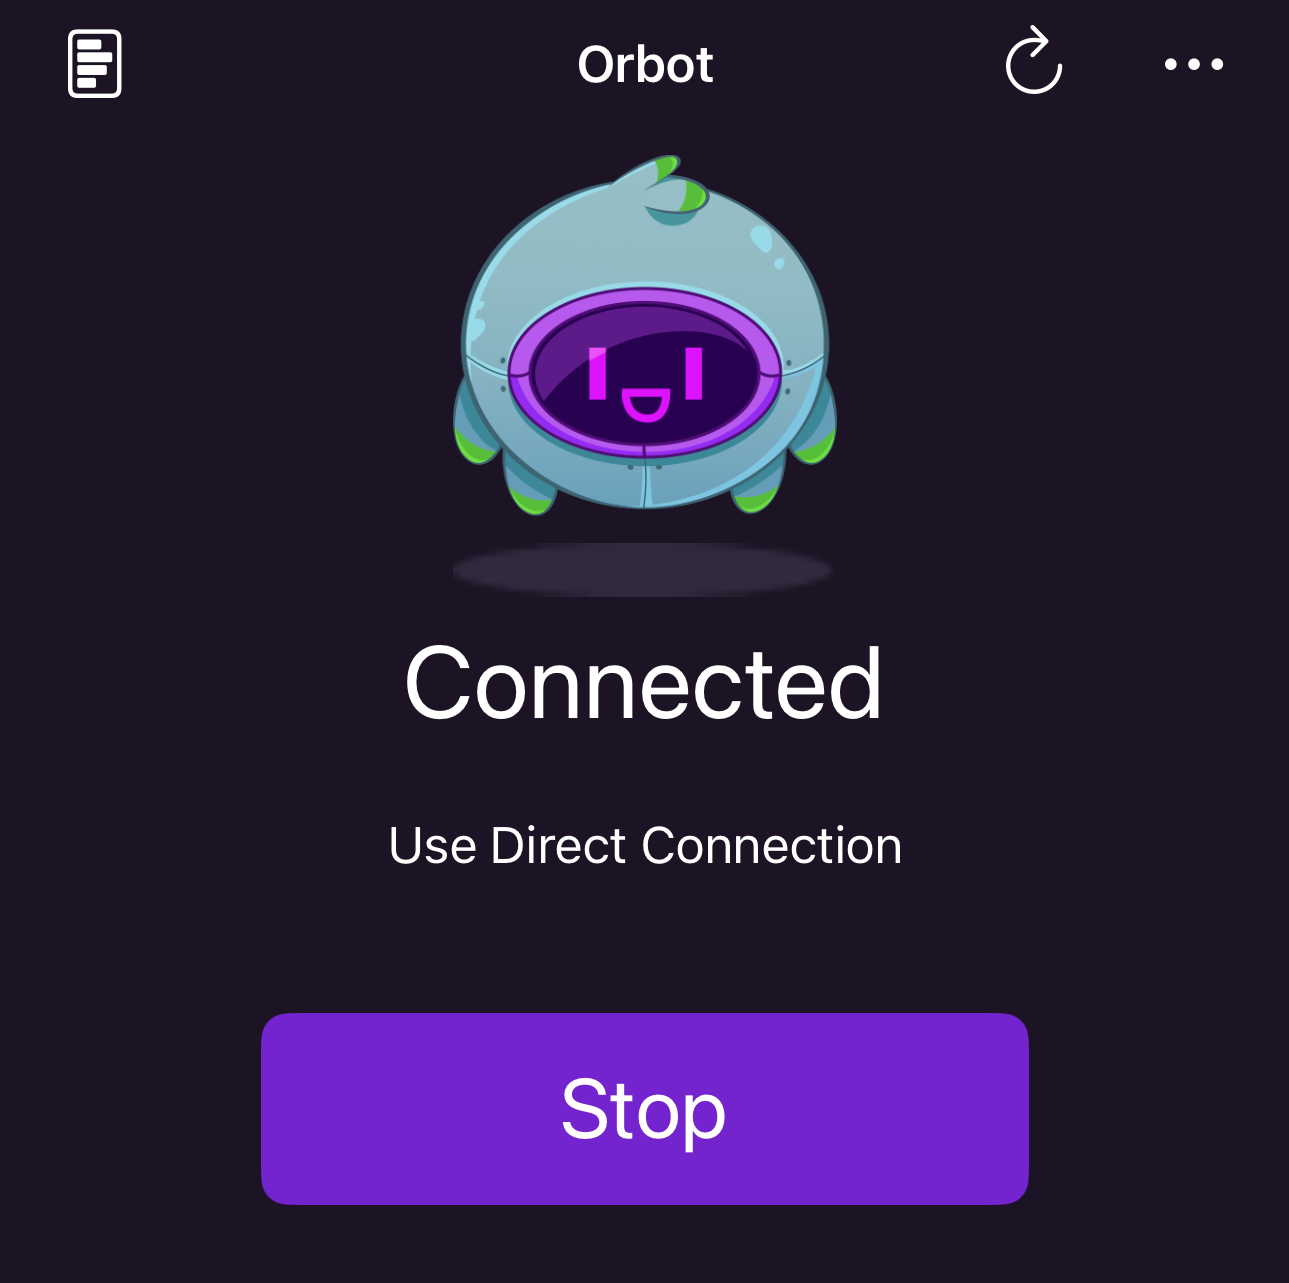
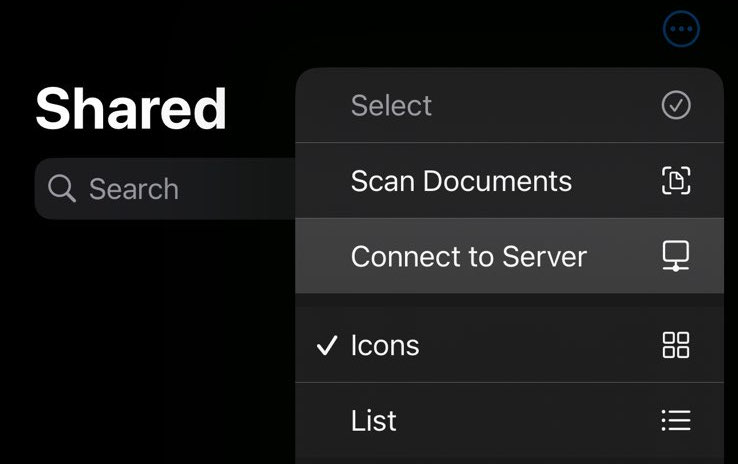
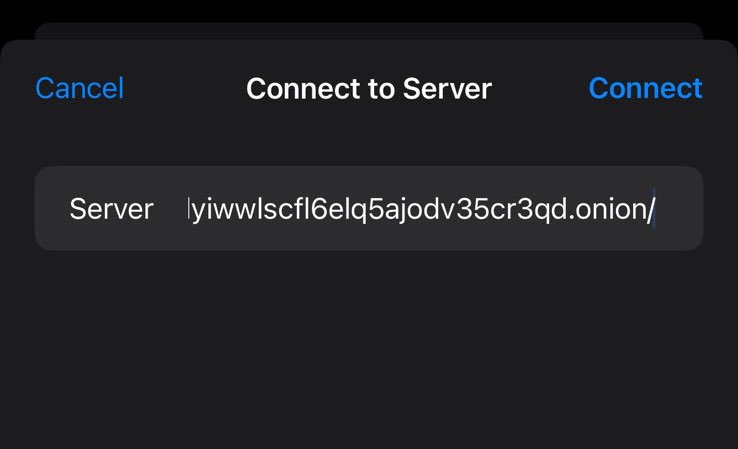
Once Orbot is connected, navigate to Files, and select Shared in the bottom menu bar. Open the options menu and select Connect to Server.
Input your WebDAV URL.
Sneakernets
“Sneakernet” is an informal term that refers to transferring data between parties using physical media, like a USB drive, instead of networks. In scenarios where bandwidth is limited, internet access is unavailable, or in cases where the threat model warrants that some data not be transmitted over the internet, sneakernets offer security. They do this in the form of a greatly reduced attack surface, because unauthorized access to data over a sneakernet requires physical access to the media it is stored on.
dusk is built with sneakernets as a transmission model in mind. A subset of the shred/retrace protocol is implemented to function without network access - instead using an array of USB drives. This is called dusk/SHOES (dusk over shoes). SHOES is an acronym for Simple Human Operated Encrypted Sneakernet.
dusk/SHOES
This feature is experimental.
The dusk CLI includes a --shoes option that can be used in 3 ways:
dusk --shoeswill setup a new dusk/SHOES USBdusk --shred --shoeswill encrypt/shred/encode/distribute a file tonUSB drivesdusk --retrace --shoeswill retrace a file fromnUSB drives, then decrypt and save
Setting up a dusk/SHOES USB functions a lot like setting up dusk on first run. All of the configuration, identity keys, and data directories are created on the USB. The dusk/SHOES USB can even be used to run dusk online later.
Shredding a file follows a guided prompt. Retracing follows a similar process.
Configuration
dusk requires a configuration file to get up and running. The path to this file is given to dusk when starting a node (or the defaults will be used).
dusk --config some_config.ini
If a configuration file is not supplied, a minimal default configuration is automatically created and used, which will generate a private key, database, and other necessary files. All of this data will be created and stored in $HOME/.config/dusk, unless a --datadir option is supplied. Valid configuration files may be in either INI or JSON format.
AlwaysPromptToUpdate
Default: 1
Tells dusk to prompt for updates on startup. Will only prompt once per day.
DaemonPidFilePath
Default: $HOME/.config/dusk/dusk.pid
The location to write the PID file for the daemon.
PrivateKeyPath
Default: $HOME/.config/dusk/dusk.key
Path to private key key file to use for identity.
PublicKeyPath
Default: $HOME/.config/dusk/dusk.pub
Path to public key key file.
DrefLinkPath
Default: $HOME/.config/dusk/dref
Path to write dusk’s device address.
PrivateKeySaltPath
Default: $HOME/.config/dusk/salt
Path to write the password salt for private key encryption.
IdentityNoncePath
Default: $HOME/.config/dusk/nonce
Path to write the identity proof nonce.
IdentityProofPath
Default: $HOME/.config/dusk/proof
Path to write the identity proof.
EmbeddedDatabaseDirectory
Default: $HOME/.config/dusk/dusk.dat
Sets the directory to store DHT entries.
MetadataDirectory
Default: $HOME/.config/dusk/dusk.dag
Sets the directory to store snapshot metadata.
VirtualFilesystemPath
Default: $HOME/.config/dusk/dusk.vfs
Sets the directory to store the encrypted filesystem snapshot.
AutomaticallyShredVirtualFS
Default: $HOME/.config/dusk/dusk.dat
Tells dusk to automatically shred the VFS on exit and retrace on restart.
NodeListenPort
Default: 5274
Sets the local port to bind the node’s RPC service.
OnionVirtualPort
Default: 80
The virtual port to use for the hidden service.
OnionHiddenServiceDirectory
Default: $HOME/.config/dusk/dusk.hs
The directory to store hidden service keys and other information required by the Tor process.
OnionLoggingEnabled
Default: 0
Redirects the Tor process log output through dusk’s logger for the purpose of debugging.
OnionLoggingVerbosity
Default: notice
Defines the verbosity level of the Tor process logging. Valid options are: debug, info, notice.
WebDAVEnabled
Default: 1
Tells dusk to make the WebDAV service available.
WebDAVListenPort
Default: 5276
Local port the WebDAV service will listen on.
WebDAVRootUsername
Default: dusk
Sets the username for accessing the WebDAV service.
WebDAVAnonUsername
Default: anon
If the anonymous dropbox feature is enabled, this sets the username for anonymous users. Same for files in the Public/ folder.
WebDAVAnonDropboxEnabled
Default: 0
Enables a virtual share in the WebDAV service that is write-only for anonymous submission.
WebDAVPublicShareEnabled
Default: 1
Enables the Public/ folder as read-only to anonymous users.
WebDAVHiddenServiceDirectory
Default: $HOME/.config/dusk/webdav.hs
Where to load the Tor configuration from.
NetworkBootstrapNodes[]
Default: undefined
Add a map of network bootstrap nodes to this section to use for discovering other peers. Default configuration should come with a list of known and trusted contacts.
VerboseLoggingEnabled
Default: 1
More detailed logging of messages sent and received. Useful for debugging.
LogFilePath
Default: $HEAD/.config/dusk.log
Path to write the daemon’s log file. Log file will rotate either every 24 hours or when it exceeds 10MB, whichever happens first.
LogFileMaxBackCopies
Default: 3
Maximum number of rotated log files to keep.
ControlPortEnabled
Default: 0
Enables the RPC control interface over a TCP socket.
ControlPort
Default: 5275
The TCP port to for the control interface to listen on.
ControlSockEnabled
Default: 1
Enables the control interface over a UNIX domain socket.
ControlSock
Default: $HOME/.config/dusk/dusk.sock
The path to the file to use for the control interface.
TestNetworkEnabled
Default: 0
Places dusk into test mode, significantly lowering the identity solution difficulty and the permission solution difficulty.
Advanced
Command Line Interface
Every feature dusk has is exposed through it’s command line interface. In fact, even dusk’s graphical interface just aliases shortcuts to common CLI options. Desktop integration is achieved using Zenity any place where dusk would ask for command-line input.
In lieu of re-documenting every option here, run dusk --help from Terminal. This will print all of it’s options and look something like this.
$ dusk --help
Usage: dusk [options]


  🝰 dusk 2.0.0

  anti-©opyright, 2024 tactical chihuahua
  licensed under the agpl 3


Options:
  -V, --version               output the version number
  --config, -C <file>         path to a dusk configuration file (default: "/home/em/.config/dusk/config")
  --datadir <path>            path to the default data directory (default: "/home/em/.config/dusk")
  --setup                     runs initial configuration only then exits (does not connect to network)
  --kill                      sends the shutdown signal to the daemon
  --shutdown                  alias for --kill
  --reset                     restores the default configuration
  --destroy                   prompts to shutdown dusk and deletes the entire data directory
  --testnet                   runs with reduced identity difficulty
  --menu, -I [submenu]        prompt user with interactive menu (default: text / graphical with --gui)
  --daemon, -D                sends the dusk daemon to the background
  --background                alias for --daemon, -D
  --restart                   gracefully shuts down dusk and restarts it in the background
  --quiet, -Q                 silence terminal output that is not necessary
  --gui                       prompt with graphical dialogs instead of command line prompts
  --install                   writes linux .desktop entry to $HOME/.local/share/applications
  --uninstall                 deletes linux .desktop entry from $HOME/.local/share/applications
  --update                    checks if a newer version is available, installs it, and restarts dusk
  --enable-autostart          adds linux .desktop entry to $HOME/.config/autostart
  --disable-autostart         removes linux .desktop entry from $HOME/.config/autostart
  --rpc [method] [params]     send a command to the daemon
  --repl                      starts the interactive rpc console
  --control-port <port>       use with --repl / --rpc to set the control port to connect to
  --control-sock <path>       use with --repl / --rpc to set the control socket to connect to
  --logs, -F [num_lines]      tails the log file defined in the config
  --show-links                shows a list of saved startup seeds / linked devices
  --link [dref]               adds a startup seed / device link
  --unlink [id_or_shortname]  removes the given startup seed
  --export-link               shows our shareable device link
  --export-secret             dumps the private identity key
  --export-recovery           dumps the bip39 recovery words
  --shred [message]           splits and pads message into uniform shards
  --retrace [bundle]          re-assembles a dusk bundle created by --shred
  --vfs                       use with --shred or --retrace to operate on the virtual filesystem
  --open                      runs xdg-open on things when possible
  --ephemeral                 use with --shred --encrypt to generate a one-time use identity key
  --encrypt [message]         encrypt a message for yourself
  --pubkey [hex_pubkey]       use with --encrypt to set target or alone to print your key
  --decrypt [message]         decrypts the message for yourself
  --file-in [path]            specify file path to read or be prompted
  --file-out [path]           specify file path to write or be prompted
  --with-secret [hex_secret]  override the configured private key, use with --decrypt and --retrace
  --shoes                     setup a dusk/SHOES USB or use with --retrace, --shred
  --usb                       alias for --shoes
  --dht                       use with --shred, --retrace to store/retrieve shards to/from network
  --lazy                      store entries in the local database for later replication
  --local                     use with --shred, --retrace to store/retrieve shards to/from local database
  --test-hooks                starts onion service that prints received hooks from subscribe() handlers
  --yes                       automatically confirm all y/n prompts
  -h, --help                  output usage information
More in-depth documentation on dusk’s low-level interfaces are found in the comprehensive Developer Guide.